|
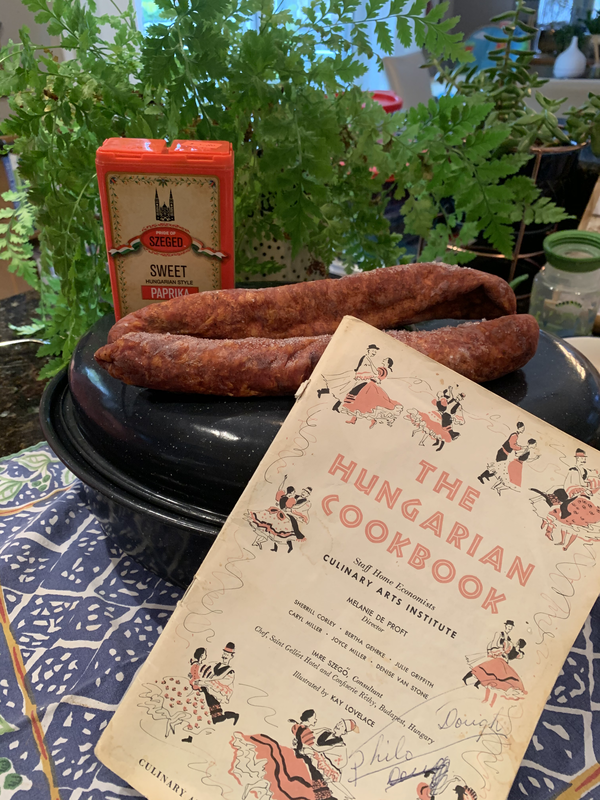
This recipe is a family recipe that I have modified of course over the years. Growing up, it was my favourite dish of all time that my Hungarian grandmother made for special occasions. A batch always on my birthday along with Dobos Torte, it was heavenly.
When I started creating my own traditions as a wife and momma, it only felt right to let this recipe grow up with me. I'm really the only one that makes it in all of our extended family and therefore love making it when anyone comes home or I'm visiting the relatives. EVERYONE dies for it. I make it on request and it is usually one of our big holiday meals. The only bad thing is the food coma afterwards. I've shared the recipe many, many times and now am writing this so that I can share it with Maverick. Maverick is my one of best and oldest friend's son, he contacted me the other day to ask for the recipe. Wendy, Dan, Mav and Morgan came to have a Christmas din with us and because we share our Hungarian heritage, I made them my famous Paprikash. I'm so happy it was a hit. We of course served up Vinetarta (recipe in blog already) for dessert to satisfy the other side of our heritage, yes they are Icelandic vikings too. There is nothing so special as sharing family recipes but also sharing table time with amazing people.
I like to make this early and let it cook on low for several hours. I serve it with what my grandmother called "Granny's Rice" which she also made especially for me a thousand times. I also make this early and let it sit on the stove, it makes the rice soft and fluffy. I will include the recipe for that as well as you can't have one without the other. Now, be warned, this is NOT a calorie conscious recipe and I think it's sacreligious to make it so, it's just not the same nor as good.
I will add a picture to this once I make it again. I wanted to get this out because Mav has company to cook for. Now you might have to adjust the meat quantities as I am usually cooking for a crowd but I will give the recipe to cook for 4-6 people. I am putting it down on paper because I realized that the recipe in my recipe book no one would understand but me.
I usually use chicken thighs as they are more tender and they soak up the flavour better than breasts, breasts I just find too dry. I allot 3-4 thighs per person, trust me, 2 isn't close to being enough, besides, everyone here loves the leftovers. the recipe....
12-16 chicken thighs
1 cup of flour mixed with Hungarian paprika (can use regular), parsley, 1 tsp of onion powder, salt and pepper to taste Add Cayenne pepper to taste depending on your heat preferences Dredge the thighs in the flour mixture. 1 large onion diced add oil to the bottom of the pan 2 lengths sliced Hungarian sausage (medium heat) 1 package of bacon, sliced up in bits and quick fried 3 tbsp Hungarian Paprika Fry all of this up until bacon is cooked and onions are clear. Once it's fried up, transfer and strain into a roaster. Keep the juices in the frying pan. In the same frying pan with the leftover bits and juice from the previous stuff, you are going to fry up the chicken. 1/2 inch of vegetable or canola oil heat up the oil and get the chicken ready to fry. After dredging the chicken, cover the bottom of the pan and fry until slightly browned on both sides. You will have to do this in batches. As you are finished frying the chicken, add it to the other ingredients in the roaster. Add another tbsp of Hungarian to the chicken as you are frying it up. You will have to add more oil to the pan after every batch you fry as it soaks it up. Take the last bit of chicken out of the fry pan and transfer. With what's left in the pan, add: 1 litre of WHIPPING CREAM, YES FULL ON WHIPPING CREAM 1 large sour cream, full fat 2 tbsps of vinegar Heat it in the frying pan, stirring consistently to get all the bits off the bottom of the pan. Pour this mixture over all the ingredients in the roaster. Bake on 300 degrees for at least 3 hours. or 350 degrees for an hour and a half if you're in a rush. EDIT: December 2023 Yes, an instant pot rendition. Did I mention How the instant pot has changed my life? I now add all of the ingredients except the cream and sour cream into the instant pot and saute just to get some chicken bits and extra flavour, then I add all of the other ingredients on top and I pressure cook for 30 minutes. that's it. It the sauce is too runny, add a flour mixture to thicken.
0 Comments
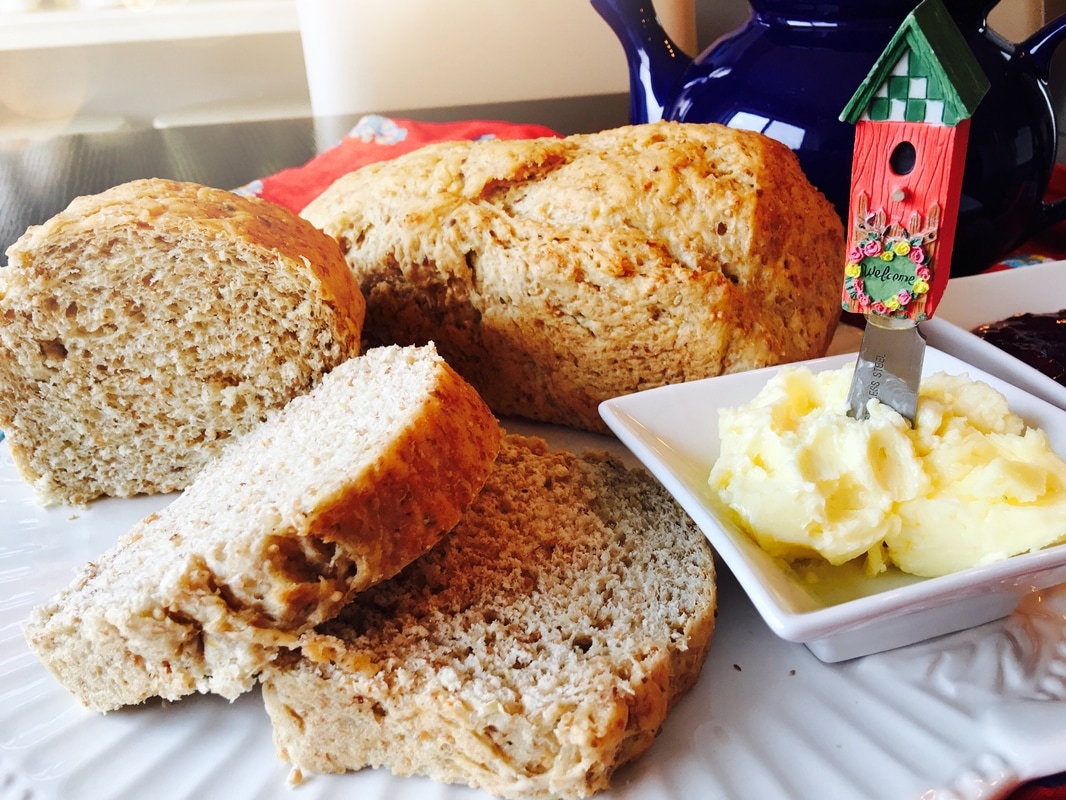
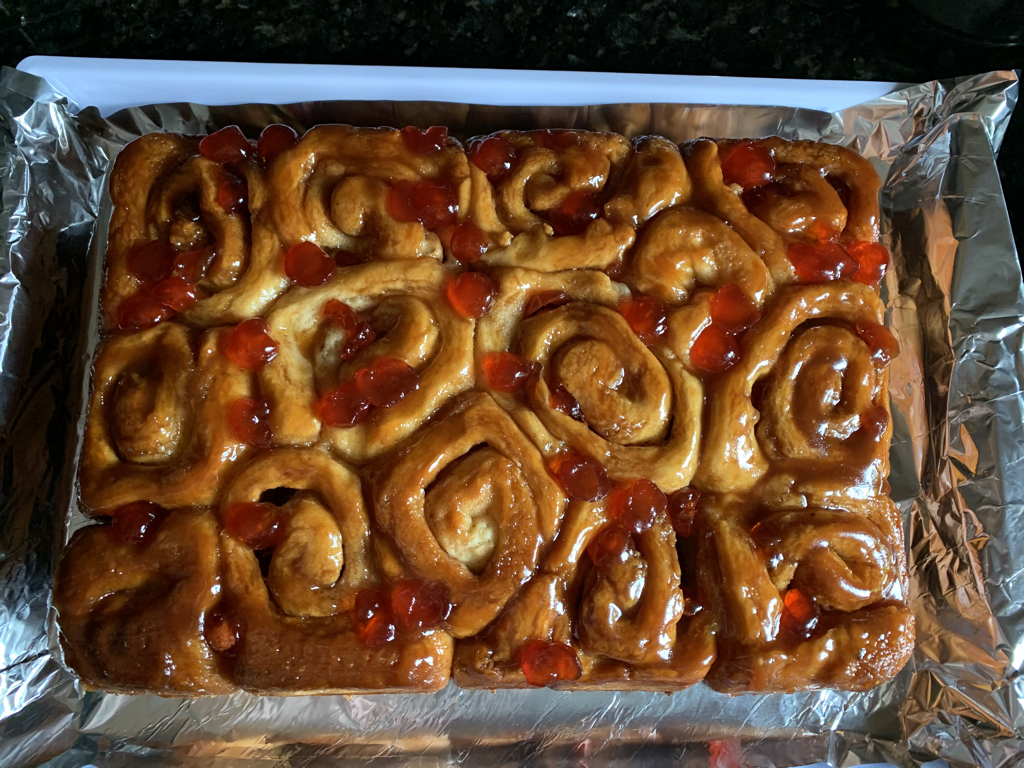
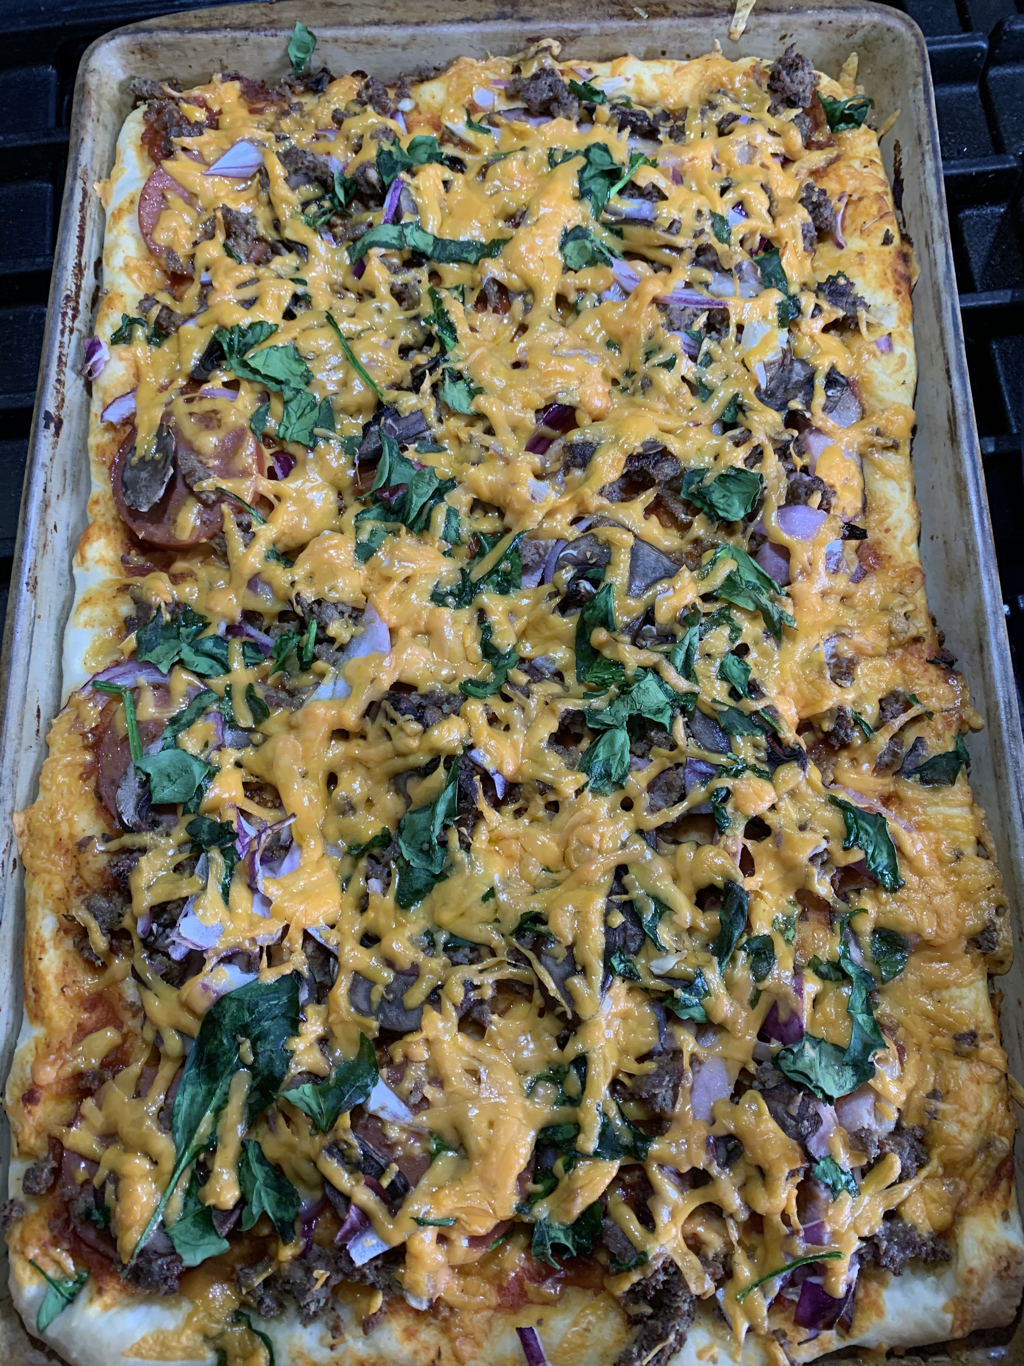
I don't eat much bread these days, probably because my body just doesn't like it. That and, well, store bread has become disgusting. I found I was trying to buy "healthy bread" over the last few years, and although it was supposed to be healthy, it tasted like crap too. Just more stuff in it. I also have been working diligently to not buy prepared foods or anything with preservatives and such in it, we just don't need all of that garbage in our bodies either. So...with having a 16 year old in the house, that eats like a horse, I thought I would start baking bread. I stopped baking bread years ago, actually in 1990, as I was pregnant with my middle son Devon. I was a good little wife, stayed home, looked after babies, barefoot and pregnant, I cooked, I baked, I did crafts like all good wives do. (lol...well at the time I thought so) On top of that I was baking bread, no bread maker, just my bare hands, thank goodness I watched my mom and both of my grandmothers bake bread, I wouldn't have a clue otherwise, as it's an art. Long story short, I had to stop baking bread as it was causing contractions, every time I started kneading the dough. That was about once a week back then, the doc just said no way, you're off bread duty. I haven't baked bread since. Until recently, I was searching for comfort food, and well always go back to things from our childhood primarily, I do anyhow. I pulled out the bread maker, which actually is a hand me down from the significant other of the man I called husband way back then. Too funny. I guess something good came out of it. LOL! I started experimenting with bread recipes and we started eating bread again. There truly is nothing like home baked bread. And yes, I continue to slather the butter on it, however I am now in a 12 step no bread program for my addiction that I've caused. Now I only bake enough for my kids to each get a loaf, and my youngest for his lunches for the week. Store bread doesn't even come close, in fact after eating home made bread again, I'm not going to buy store bread again. The great thing is, for whatever reason, my homemade bread doesn't bother my guts quite as much. I've perfected the recipe and wanted to share and hope that you try it. RecipePull out your bread maker, as this is a bread maker recipe! In the bottom of your mixing container add items in this order: 1 cup of water 2 tbsp of honey or 2 tbsp of sugar 2 eggs 2 tbsp butter or 1/4 cup of oil 1 tsp salt 3 cups of Robinhood Flour ( I usually use 2 cups of white all purpose and 1 cup of bread blend for loaves/buns) 1 1/2 tsps bread maker yeast Place in bread maker on dough setting only. I never cook my bread in the bread maker as it gets too hard and crusty. I find baking it in the oven gives me two smaller loaves that are much softer. Once the dough cycle is complete, flour your counter surface and knead the dough. Cut the dough in two equal parts (if you want two smaller loaves) and place in Pam sprayed pans or greased with butter. If you chose to use as one loaf, make sure it's a bigger loaf pan. I use my grandmothers if I only want one, that pan still keeps going! Once in the loaf pan, I cover the dough and let it rise, usually an hour or so, until it reaches a nice height. For this I tend to preheat my convection microwave oven for a few minutes just to make it warm and set the pans in there to rise. Bake the bread on 350 for about 30 minutes, I pull mine out when it gets a nice golden brown. Once out of the oven, pull the bread out of the pans immediately and put on cooling racks. (the bread gets soggy if you don't do this) Use a pastry brush to brush the tops of the bread with butter. If you want variations to this bread, I've substituted Rye flour for 1 cup and add flax, grains and especially spices. When I bake this bread for dinner, I always throw a blend of spices in that compliment the main entree that I'm creating. This is the easiest recipe to adapt! You can't go wrong~! Added note: I use this dough recipe for everything. We make our homemade pizza out of it, we just start a little earlier making the dough. It will make a large cookie sheet and a round pizza pan worth of dough. I make tray buns, when cut into equal potions, this recipe fits into a 9x13 pan. Cinnamon buns!!! Yes! Just made some today. The one bread recipe will make a 9x13 pan. Enjoy!
#recipes #food #breadrecipe #pizza #pizzadough #cinnamonbuns #traybuns #buns #marthastewart #allrecipes #foodnetwork #canadianliving #foodblog #blog #blogging #blogger #foodie #food of instagram #CharisOnLife #CharisOnFood #lifestyleblogging #bloggingmom #travelblog #affiliatemarketing #adpost #amazonprime #trustedhousesitters #Viator #tripadvisor #etsy #denby #qatarairways
The latest CharisOnLife blogpost, Ryan and Pink Moscato, has mention of this recipe because it's witnessed many a movie night in our house! got this recipe from my sister many years ago and it is a staple in our house, especially when we are having movie night. It truly is the best chip dip ever. You can use it on veggies as well or sometimes if there are leftovers, we spread it on just about anything. Yes, we do love our HIP CHIP DIP. Why did I call it HIP DIP? Because it literally goes straight from your mouth to your hips. Sometimes, you just gotta do it!
I'm laughing as I am searching through my cookbook because I can't find the recipe ... then I realized that I have been making it for so long that i was actually making it from memory. 2 cups of sour cream 1/2 cup of Miracle Whip 1 clove of garlic or 1 tsp of dried garlic powder 2 tbsp. of dried onion or 1tsp of onion powder 2 splashes of Worcestershire Sauce 1/4 tsp of cayenne powder 1 tsp of parsley 2 tbsp of dried DILL (this is imperative) Mix it all together and then let it sit in the fridge for at least of couple of hours. (just to let the onion hydrate. I make variations of this all of the time depening on whether I have dried onion or fresh garlic or not. IOt still tastes amazing no matter what I throw in, haven't had any complaints as of yet. Our fave flavours of chips are salt and vinegar or the Lay's ruffles. Happy movie night! Well, since I teased you yesterday with all the talk about baking Vinarterta in the, Old Fogies, Gray Hair and Infinite Wisdom blog post, I thought I would give you the secret 'CMOV' recipe. ( you will have to read the blog post to catch the meaning of this one). For those of you that don't know, Vinarterta is a Icelandic traditional layer cake that has blessed many a special occasion in the region where I grew up. It is brought out at Christmas, weddings, birthdays, showers... you name it. For us, it's usually special occasions because it takes some time and lovin' to make.
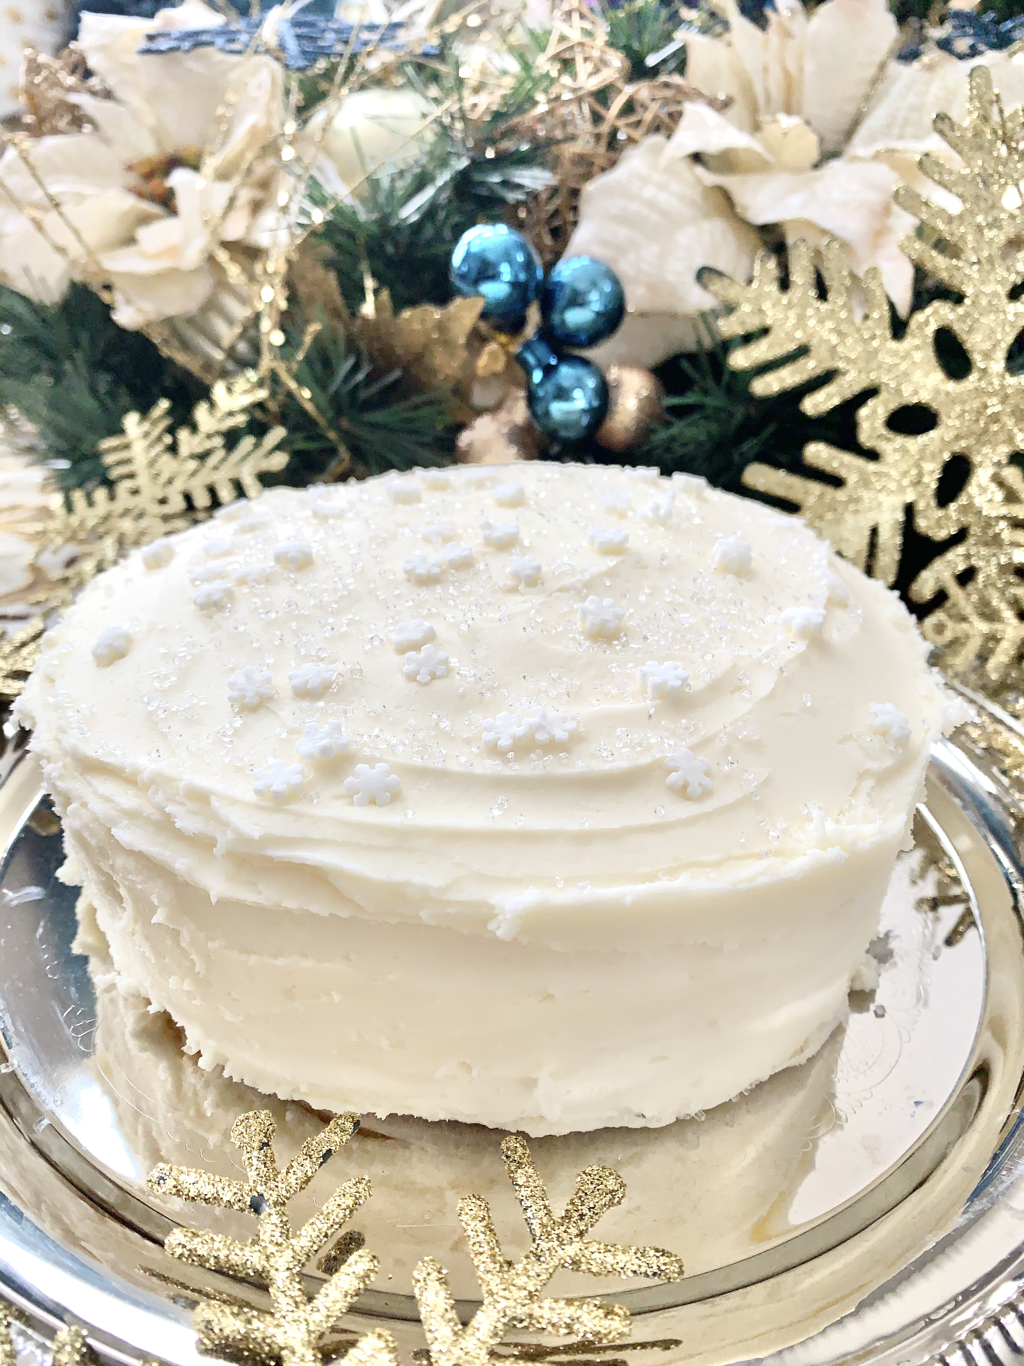
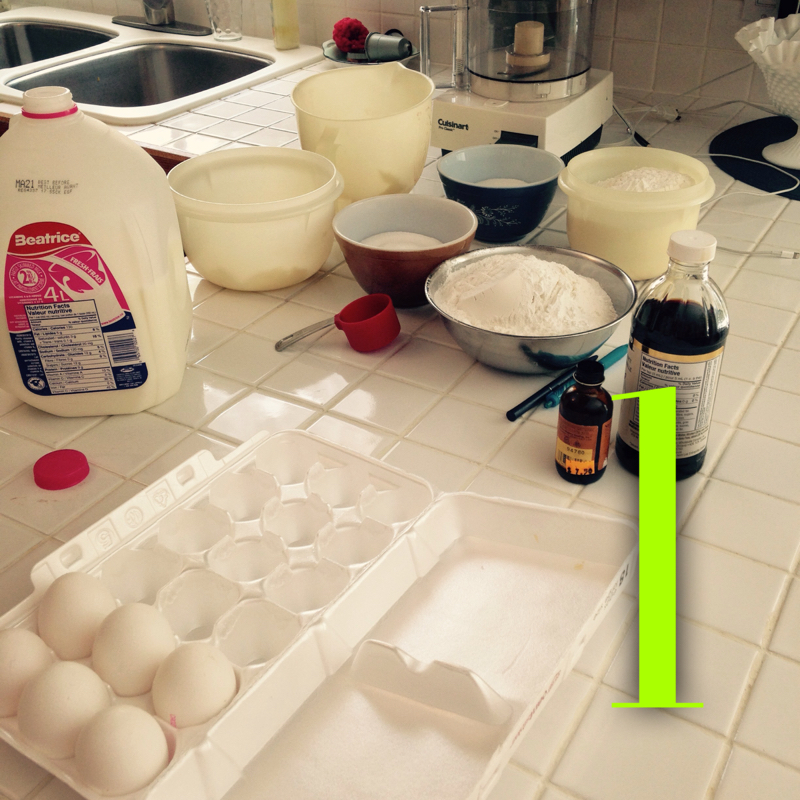
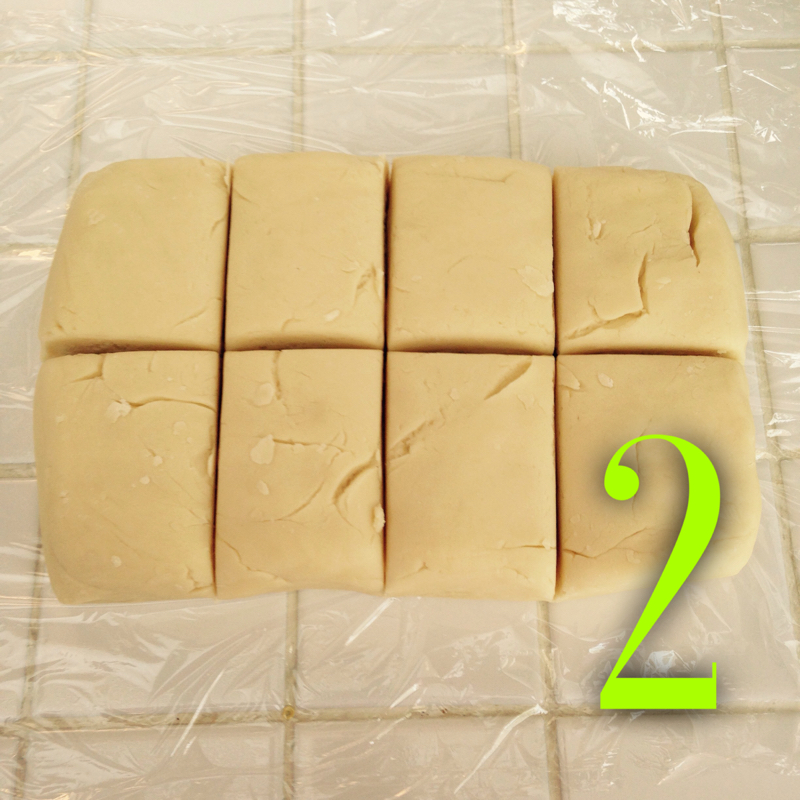
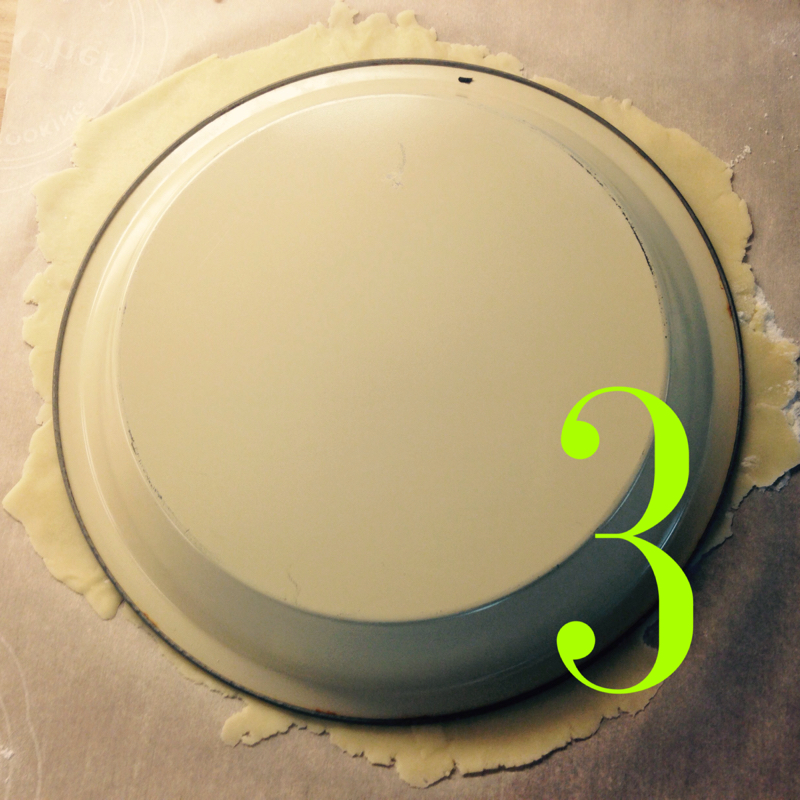
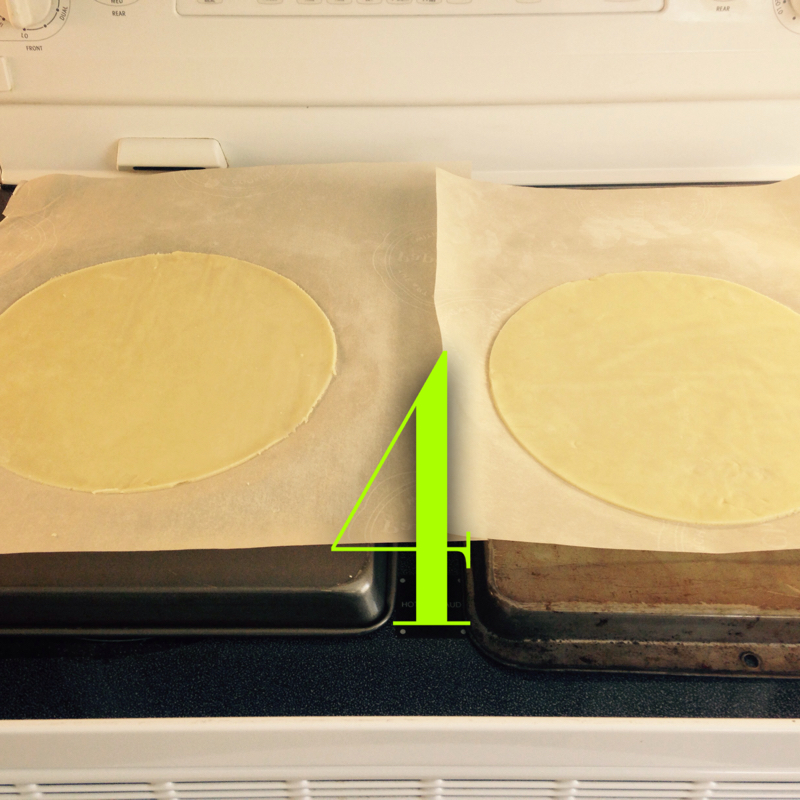
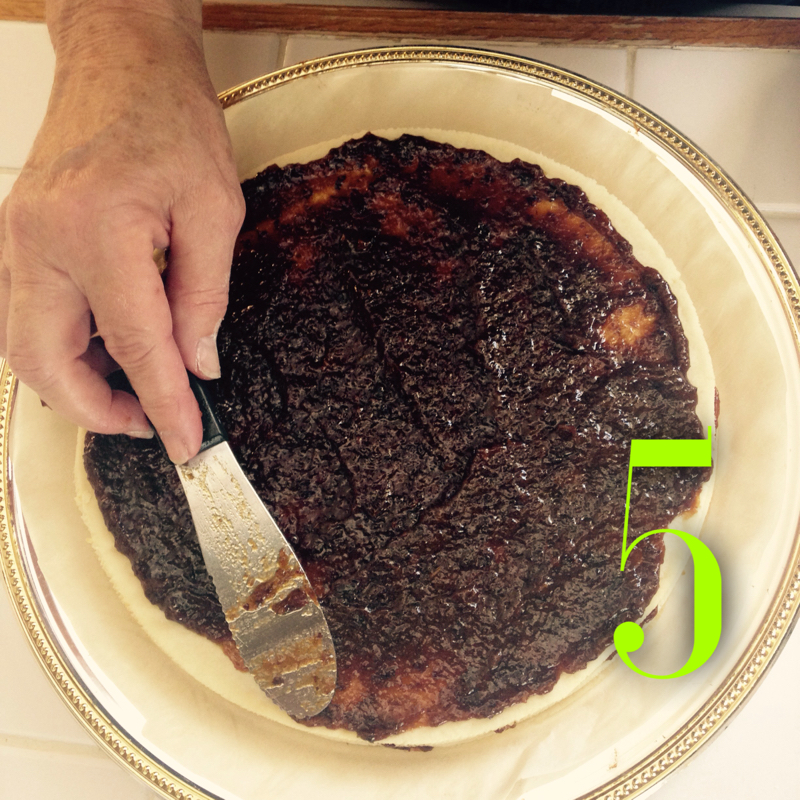
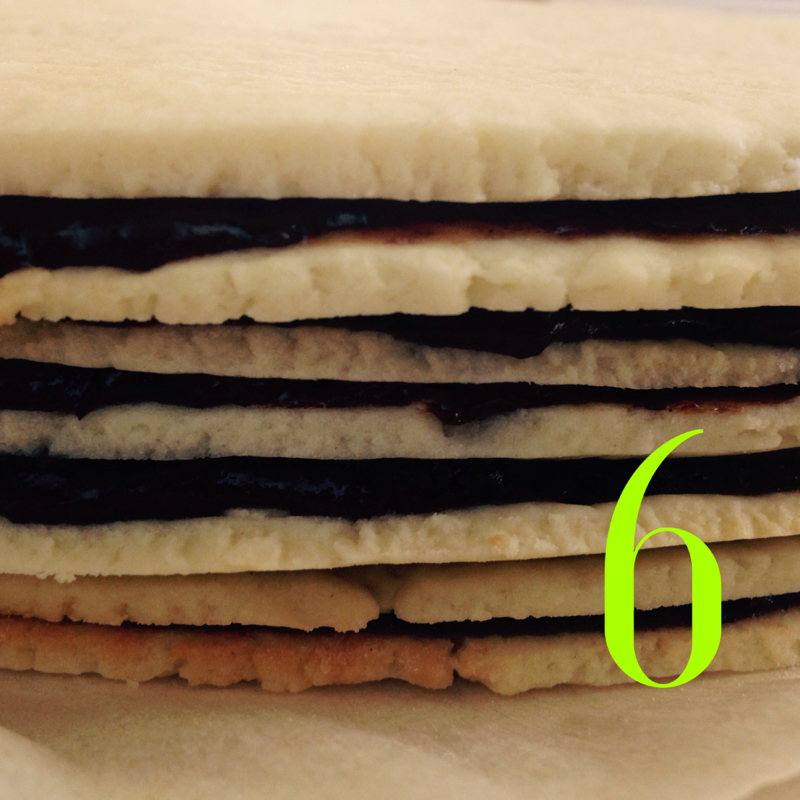
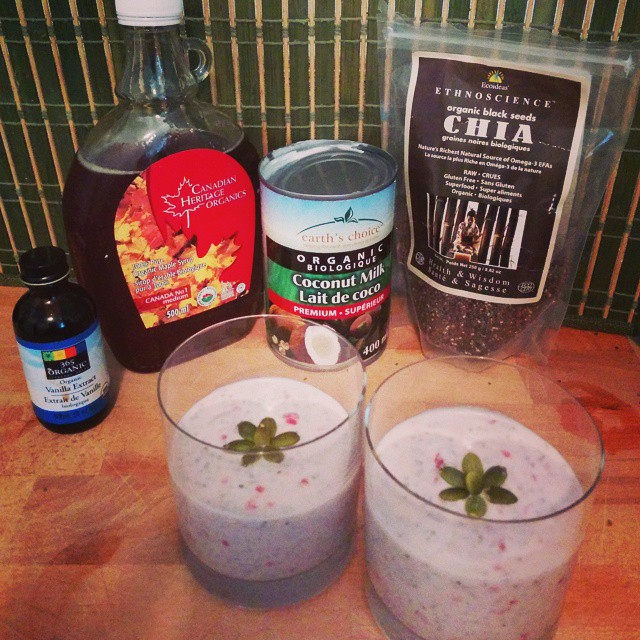
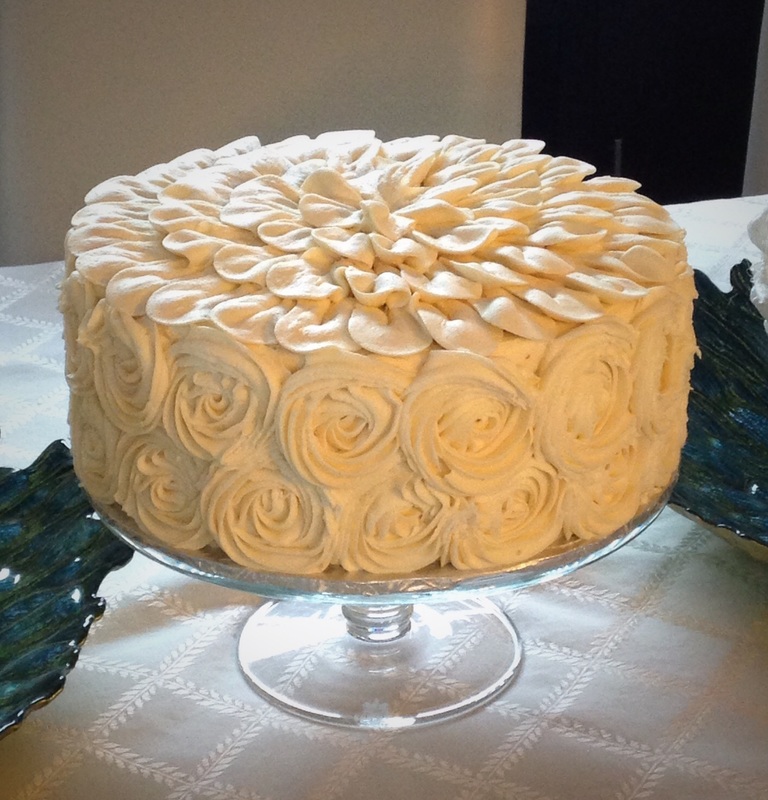
My mom, the 'CMOV', provided the experience and knowledge in this recipe and we have a few pictures to send along with it to hopefully help you along in the Vinarterta experience. I would recommend that you choose someone fun to bake with, it makes the time fly by and it's amazing how may topics that you can cover off in an hour. For us, we doubled the recipe, so we yakked for a couple of hours. Trust me, if you're making Vinarterta, you might as well make several at a time. Filling Ingredients: (make a day before you are ready to put your Vinarterta together) See edit below for prunes. (2) 1.6 kg Prunes (costco bag) Cook prunes for about 1/2 hour. drain off excess juice and put to the side. Mash finely or put in food processor. Once you have done this, put the prunes back onto the stove and add the next ingredients: 1 cup of sugar 2 tsp vanilla 1/2 tsp almond flavouring 2 tsp cinnamon 1 tsp cardamon powder Cook prune mixture until the consistency of jam, approximately 5 minutes. Cool mixture. Edit: December 2023 I now cook my prunes in the Instant Pot, as it takes less time and the prune mixture becomes nice and smooth. I use the prunes from Costco, the 1.6 kg bags and I can fit 2 bags into my 8 qt Instant pot. In this variation I only add 3 cups of water to the pot with all the other ingredients and I pressure cook for 6 minutes. I let then let the prunes do a natural release in the instant pot until the pressure button has realeased. I let them cool slightly before mashing them. I find it easier to mash while hot to warm. Let cool fully before layering with your dough layers. Now you're ready to make the dough. Be careful not to have dough lovers around because the dough is really so good, it disappears in the hands of unsuspecting children. Dough Ingredients: 1 cup of softened butter 1 1/2 white sugar 3 eggs(medium) 1/4 cup milk 1 tsp vanilla 1/2 tsp salt 4 cups of flour 2 tsp baking powder parchment paper Cream butter and sugar. Add eggs, one at a time, beating after each addition. Mix milk and vanilla, beating well. Gradually work dry ingredients into egg mixture, knead until soft like cookie dough. Wrap in plastic wrap and put dough ball into fridge for at least two hours, cold dough is easiest to work with. Set oven to 350 degrees. Once the dough has chilled, measure into 8 equal portions. (this is totally dependent on how many layers you like your Vinarterta to be... we prefer, 6-7. (Mom always uses what dough is left over to make a jam filled dough treat and pops it into the oven, this I believe, was a ploy to keep us kids from whining about wanting to eat the fresh Vinarterta. It worked!) Cut out 10 pieces of parchment large enough to cover a 9" pie plate (top). You will need this for rolling out the dough and save you TONS of grief and heartache. Now the next part, in my mind, makes or breaks the Vinarterta fabulousness. The layers CANNOT be too thick, thin please, the layers of cake and prunes has to be the right ratio. Set out your parchment paper and sprinkle with a bit of flour to roll the dough out. Place your dough, and then place another piece of parchment paper on top and roll away. (Continue to use this top piece of parchment paper for rolling purposes only) The amount of dough will give you the exact amount for that pie plate. So ... take out your marble roller and do your magic. Take your 9" pie plate and lay it top down onto the dough and cut out your circle. Lift the dough circle and your piece of parchment paper and put it off to the side. (we make two at a time). Roll out your next piece of dough. Now you're ready to shake and bake baby! Lay your parchment piece with your dough circle on top of a cookie sheet that is inverted. Same for your other layer. Put both pans in the oven and put a timer on for 3 minutes, at 3 minutes flip the trays from top level to bottom level, so that they cook evenly, put timer on again for 3 minutes. (Lightly browned on the edges) Once they are ready, slide the parchment onto the counter and let your layers cool. Filling! YUMMY! I could eat a bucket of this... some say you have to be a true Icelander to appreciate this...Ha! Take 1/2 cup of your prune filling and spread on each layer. DO NOT SKIMP! Remember, Charis and the CMOV said, the filling is the best part. Start layering. Once you have built your beautiful Icelandic dream... wrap the entire cake again in plastic wrap and let sit on the counter for two days. (Cover with a towel) It makes the cake moist. This is the point at which we usually freeze our Vinarterta until we are ready to use it. (The frosting is always better when it's fresh) Vinarterta Icing: I'm lazy... use your favourite butter icing recipe BUT ADD ALMOND FLAVOURING! This is key... Now if you are like me, I hoard my CMOV Vinarterta, it's too precious to share, in fact, I will only share under duress and IF I REALLY like you. This year for Christmas all we asked for from my parents was a Vinarterta each from my mom and a wood carving from my dad. It's that precious. In past years, my mom always gave each of us girls a cake, and I even hid it from my kids! Okay, maybe a shared a bit... but no one else. :) The CMOV and I both hope you enjoy your Vinarterta baking and please let us know how you make out. I will be adding pictures for instruction later this evening as we are about to embark on another afternoon of baking! #Vinarterta #Vinatarta #vinetarta #Icelandic #IcelandicBaking #tradition #cooking #recipes #baking #prunes #layercake #almondFlavoring #almondicing #parchmentpaper #buttericing #food #PrairieFood #VikingFood #CMOV #CharisOnFood #CharisOnLife Makes 4-6 servings This decadent pudding takes only about 5 minutes to whip up! The chia seeds plump up like tapioca pearls, creating surprising texture. Rich, creamy, and naturally sweet, this makes for a great breakfast or snack. Pack individual servings in little mason jars and take ‘em on the go! Ingredients: 1/3 cup chia seeds 1 14oz can coconut milk, full fat, whisked until smooth 2-4 tablespoons maple syrup 2 teaspoons pure vanilla extract 1 cup raspberries, thawed from frozen and lightly crushed Method: 1. In a medium bowl, whisk all the ingredients together. Taste and add more sweetener if needed. 2. Pour into little ramekins or mason jars and top with extra raspberries to make it extra pretty! 3. Chill in the refrigerator for at least 20 minutes before serving. Chia pudding will last up to 4 days in the refrigerator.  Courney Schwegel is one of our guest food bloggers on CharisOnLife. She is a Professional/personal chef, Holistic Nutrionist, and Food Enthusiast. "To me, food is about love. It’s about sharing, and it’s about nurturing ... I always knew that it would always be the driving force behind my cooking." Feel free to share this recipe, everyone you know will want to whip up this recipe. All the ingredients to have a successful cake are usually right in your cupboard! No reason to head to the store for this recipe! It's an easy to follow recipe and in the end tastes AMAZING! In your first bowl mix together vigorously: 2 dollops of character 4 dollops of intelligence 3 dollops of confidence In second bowl, mix together: 100 dollops of patience 100 dollops of understanding 200 dollops of perseverance 50 dollops of anger management In the third bowl blend these ingredients together: 1000 dollops of self worth 1000 dollops of faith 1000 dollops of love Once all three bowls have been mixed separately, alternate combining the ingredients in a very large, very sturdy, very beautiful earthenware bowl and mix gently. This ensures that the ingredients are blended properly and in the right proportions. Mix until you see bubbles of happiness forming in the batter. Bake in layer pans as you will need layers of this cake to help you navigate this thing we call life successfully. The layers will help smooth those oh so awesome bumps in the road. Bake until the cake is springy in the middle and firm to the touch. The last part is the icing on the cake, this part of course makes the rest of the cake that much more delicious so as always I SLATHER on TONS of icing. Whip these ingredients together until light and fluffy and peaks form. 6 dollops of peace 10 dollops of love 8 dollops of abundance 8 dollops of success This is the really imperative part of this recipe...share it with all of your friends and family. Everyone loves cake, and you are able to eat as much cake as you want this time. Seconds, thirds, have as much as you want. Who says you can't have your cake and eat it too? PS. Of course, serve with coffee AND Baileys ... ? Thanks to the great folks at Chocolate Zen Bakery for providing the subject matter for this piece. They baked this Red Velvet piece of Heaven for my birthday last year. I thought it was a perfect picture to describe my recipe, from now on, I'm calling it the "Flower Of Life" cake of deliciousness. You can check out my 'CharisOnFood Review on the Chocolate Zen Bakery' by clicking on their link in the review. #recipe #cake #life #success #perserverance #relationships #love #abundance #CharisOnLife #CharisOnRelationships #CharisOnEmpowerment #CharisOnFood #angermanagement #prosperity #understanding #coaching #empowerment #marriage #divorce #children #grief #bumpsintheroad #ellendegeneres #oprah #lifecoach #lifestory #chocolatezenbakery #redvelvetcake I initially made this sauce over the BBQ for a dessert feature poured over vanilla ice cream. At that time, I literally just threw all of the ingredients into a tin foil pouch and then slapped it on the 'Q' for 5 minutes.
We all loved it so much that I adapted the recipe for 'indoor' festivities. Now I whip it up on the stove and serve it with our Viking Pancake recipe. Even better, add a bowl of freshly whipped cream to add a dollop of creamy goodness on top of the banana sauce. In a large fry pan, over medium heat, melt 1/2 - 3/4 butter Add 1 cup of brown sugar, bring the ingredients to a rolling boil. I let it boil for about 2 minutes, it's important that it caramelizes. Add 1/4 cup of Kahlua and let the alcohol boil off for about a minute. Slice up bananas, 4-, and add them to the mixture. PS> you can leave out the Kahlua if you want, it still tastes like heaven in a pan. Now don't leave these on the stove for long, you really just want to coat the bananas in the caramel/Kahlua goodness. You want to make sure that the bananas stay slightly firm. Then ... SLATHER on you Viking Pancakes ... and give out a mighty ARGH! Wait... that might be more for pirates ... well ... you know what I mean. If I put anything Icelandic here you won't understand it anyhow. Let's try "SKOL!" a term use din a variety of ways to be sure. #bananas #syrup #Kahlua #Vikings #pancakes #VikingPancakes #pancakes #CharisOnFood #food #whippingcream #breakfast #breakfastfood #foodie #recipe #robinHoodFlour #flour #Skol #affiliatemarketing #recipes #allrecipes #foodnetwork #recipesofinstagram #pinterestrecipes #breakfast #dessert #bananadessert #carameldessert #MamaC #kahluarecipe First off... they are Viking pancakes only because we are Icelanders...
Second off ... to all of you out there that aren't Icelanders, Amma means grandmother ... These pancakes are HANDS DOWN the best pancakes you will ever eat. You will NEVER buy another box or bag of pancake mix EVER again! Let me entice you.... they are the fluffiest most delicious pancakes ever. This recipe came from my dear mum ... although, I think we have made it way more, try every weekend. We have a family tradition that at least one morning on the weekend, if not both we have a big hearty breakfast. Pancakes, sausages, bacon, hash browns and eggs...sometimes more. Yes I know, but with our growing family, the size of the meals need to increase as well. We were at my parents this past weekend and I think they were amazed at how much food was consumed at breakfast, by six adults and a 14 year old. We actually could have doubled the recipe and still finished it all. That's a great thing about this recipe, you can add things to it, change things around, double it... and still always fabulous. My daughter, Steph, is the 'primo' pancake maker, and rarely gives up the flipper on any occasion but has since received her own griddle and a sweet pancake flipper, for shower gifts, from her brother Devon and his GF, Brittany. When she opened the gift, she exclaimed... "Now I can have everyone over for pancakes!" THAT'S how important these pancakes are in our family. So a couple of KEY ingredients to always have on hand and some necessary tools that help create their magnificence. Sour Cream.... yes.... sour cream. Always have a tub in the fridge. A pancake griddle. Coffee and baileys. First ... make coffee Second ... Pour in Coffee and Baileys Drink. Then ... start mixin' your fixin's. It's important that you have a large bowl to mix the pancake batter in it's entirety. You will also need a smaller bowl to mix the egg mixture together with as well. Bowl One: Flour Mixture 2 cups of white flour (I have use whole wheat and multi-grain and the kids still love them) 1/2 cup of white sugar 1 tsp baking powder pinch of salt Mix together Bowl Two: Egg Mixture 3-4 unbeaten eggs 1 cup of sour cream 1 tsp baking soda 1 1/2 tsp vanilla Mix together with a fork Add Bowl Two to Bowl One Now this is the tricky part.... add milk to desired consistency. NOT TOO MUCH. You want the batter to be fairly thick and not runny. THE TRICK: Do not mix this with a mixer or hand beater, just used a big wooden mixing spoon. You will notice that the batter starts to bubble, and that is great, do not beat the batter for too long, it will go flat ... which will ruin your chance to eat fluffy Viking pancakes. Mix it long enough to mix the ingredients together and most of the big lumps out, then you're ready to go. Now all griddles are different, but I set the temperature on mine always at 325 degrees. (Make sure you spray with Pam) If you're not familiar with making pancakes, they are ready to flip when bubbles start to form. Variations: Chocolate Chip Pancakes ... add chocolate chips once you have poured onto the griddle Peanut Butter Pancakes ... Add about 1/2 cup of PB to the mix, more if you want PB and Chocolate ... Add the PB plus a tbsp of baking cocoa Banana Pancakes ... Add two mashed bananas to the batter. Apple Pancakes ... shred two apples and add to batter and 1 tsp of cinnamon The great thing is about this recipe is that the left over pancakes are awesome to throw in the fridge for leftovers. They warm up really well in the microwave or the toaster, they are also awesome cold. My kids used to pack them in their lunches! Definitely make the Bodacious Kahlua Banana Sauce the most delightful addition to these pancakes, pour GENEROUSLY over every bit of your pancakes. Enjoy our family breakfast treat! I'm just thinking that I should have taken a picture of this dish as my daughter made it for us last night for dinner. Yes, it is now a handed down recipe, and it's been shared far and wide. I had initially posted this recipe on another Blog a few years ago. The Butcher Boy (described below) is no longer around but it does add some spice to this family favourite. The history on 'Spag Nite' goes back to my kids growing up, around the later high school years and into university, this became a tradition. I kind of started off with making sure all of my daughter's friends and my son, had a full tummy before going out to party for the evening. I always told them that they needed something to soak up the alcohol so they didn't get too tipsy. We still laugh about it. Now the kids have moved on but the recipe is a standard in all of our homes. I hope you enjoy it as much as we have. BUTCHER BOY MEATSAUCE So, the BUTCHER BOY. Gotta love him. Little does this poor, unsuspecting fellow know that he has been the topic of many jibes, jokes and giggles over 'Spag Nite', which traditionally brings a table full of all the kids friends and family. Enter... Mama Chacha to local meat shop. Grocery list....check nose plug....check (I hate the smell in the meat shop...reminds me of my dad butchering cattle and the smell afterwards, so yes some unfortunate association) In waltzes BUTCHER BOY. Let me just state... he is HOT... not just a little bit...but really HOT. Again ..there might have been drool. Shake it off... So...he very nicely helps me out and I ask for a favour...I need Italian Sausage...but without the casings...(I hate taking the casings off the sausage...disgusting comes to mind.) So...he very nicely offers to whip me up some loose sausage. BEAUTIFUL! I've been searching high and low for decent sausage that is uncased. (for those of you with dirty minds...get your minds out of the gutter. I've heard it all already!) Next thing you know we have a uncased sausage love affair going and I continually have the opportunity to appreciate a handsome specimen of a man. My momma said, as long as you are alive...you can look....just don't touch. Coming from the straightest mother on earth... it's still shocking. It lets me know that I am still alive I guess. Did I mention he was smokin' hot? SO...... long story short. This same little dance happens every time I go to the meat shop and yes, the darlin' now calls me when he has more ready for me. I don't have the heart to tell him that I now have enough Italian sausage in the freezer to feed an army. So ODE TO THE BUTCHER BOY: Recipe: 6 people (adjust for more, I usually use 4 pounds) 1 package of BUTCHER BOY sausage...Mild or hot, sometimes a mixture of the two, equivalent about 3 pounds or so 1 large red onion 6 cloves of crushed garlic 2 tbsp olive oil 2 tbsp butter 1/2 package of BUTCHER BOY meat market bacon (its the best, no water) chopped before cooking 2 portabello mushrooms 1/2 pound of fried bacon in small pieces 1 cup of red wine TARRAGON!!!!!! lots... 3 tbsp 1 tbsp parsley 1-2 large cans of diced tomatoes...pureed ( opt 1) 1-2 jars of Classico Sweet Marinara Spaghetti Sauce (opt 2) this is what I have been using lately Fry onions, garlic and bacon in the olive oil and butter. Throw in UNCASED Italian sausage, fry until cooked. Add spices. Add red wine and sauce and lastly tomatoes. The longer you let this simmer...the better. Cook the pasta of your choice, pour on LOTS of sauce and freshly grated Parmesan cheese. #recipes #pasta #italiansausage #meatsauce #italian #food #meatsaucerecipe #familycooking #allrecipes #marthastewart #affiliatemarketing #adpost #TheHut #amazon #amazonprime #etsy #Lillypost #myheritage #qatarairways #tripadvisorrentals #travelzoo #blog #blogging #lifestyleblog #foodblog #foodie #bloggingmom #artist #MamaC #lifestyle This is a classic in our household, it has been the birthday cake of choice since the dark ages. EVERYONE, including our friends, request this cake for their special day. I remember my grandmother's making it, and I remember my mom whipping it up on the big day as well. My own family has taken this classic recipe to an all time new level in regards to sugar consumption... we double the recipe...ALWAYS!
By the time I have finished cutting the cake I am full of icing from fingertips to elbows...I have to fight off the kids from trying to lick it off. I'm not joking ... they LOVE it. I always make sure I use a confetti angel food cake for the actual cake, but that is just filler, it's still all about the icing. Make sure when you whip this up and your family thinks you are "the cat's meow", you'll be handing off the credit to Mama C. Ingredients: In a Large glass bowl: 4 egg whites whip until stiff In a medium pot on High:, stir together 1 cup white sugar 1/2 cup corn syrup 4 tbsp. hot water Bring to a rolling boil for a good minute (don't rush or it won't set properly) Once sugar mixture has boiled, Add slowly to the egg white mixture on low speed. Once the sugar mixture has been added in, whip icing at high speed until it thickens Add 1 tsp of vanilla and colouring if you choose Continue to whip until stiff peaks form in the icing. (dab it to check) THEN...... Gob it on that angel food cake! Eat, be messy, be merry and I wish everyone a Happy Birthday! #food #recipes #birthdaycake #icing #angelfoodcake #baking #sugar #pastry #CharisOnFood #CharisOnLife #cake #birthday #bettycrocker #mamaC #charis #charisjohannson #happybirthday #marshmallow #allrecipes #foodnetwork #affiliatemarketing #adpost #cooking #foodblog #foodie #blog #blogging #lifestyleblog #bloggingmom #travelblog #amazonprime #etsy #qatarairways #myheritage #pascoe |
Mama CBest Loved Recipes from my kitchen. Archives
October 2019
Categories |




 RSS Feed